Tuesday, December 1, 2020

Winterize a Backyard Chicken Coop

 It doesn't get super cold here in NC, but warm backyard chickens mean happy backyard chickens and a light bulb in the coop means increased egg production, so we spent some time last weekend getting the girls ready for those cold, rainy , winter days when they just don't want to leave the chicken coop. It wasn't hard to winterize the backyard chicken coop at all. Owning chickens is easier than you think.

When we built our coop, we used a coop kit very similar to this one so there isn't a lot of space. That wasn't a deal breaker for us because the girls forage around our suburban backyard so really they just needed somewhere to hang out when it's rainy and sleep at night.

Not everybody puts heaters in the henhouse for their girls, but most chicken owners will use a light in the winter because it increases egg production. This is the light we used from the video below.

Before we got the heater the girls piled on top of each other in a single nesting box. They like being cozy, even if it means the hen on the bottom might suffocate, so we figured we might need to go ahead and start finding a way to keep the henhouse a little warmer. We went with this standing heater, because it was safe to use inside of the coop and we didn't want to be stressed out about fire hazards. The heater stands on its own which is perfect. We stood it along one of the henhouse walls to encourage them to use their roosting bars which are near the heater. 

We also added another roosting bar to encourage them to hang out on the bars for easier hen house cleaning and a heated water base for the run, to keep the water from freezing.

We made a strip door using this plastic from Amazon.

Our winterizing checklist, (chick-list 😂):

  • Clean out the run and coop. Fresh shavings, wash feeders and waterers
  • Run a multiple outlet extension cord from the house, burying the cord when it crosses areas with frequent foot traffic or dog poop
  • Close doors & windows
  • Make a strip door to keep in heat
  • Set up heater
  • Set up heated water base
  • Mount laying light on a side wall
  • Set up timer to run light and put heater on a schedule
  • Double-check all of your locks and make sure you are predator proof

Download this free infographic checklist!


Tuesday, November 24, 2020

DIY Hand Marbled Christmas Ornaments

These ornaments are so gorgeous, I can't believe I made them. The high pigment alcohol inks keep the colors super saturated, the superfine glitter ads sparkle and if you add a mix of craft paint and watered down Mod Podge at the end it makes it look like vibrant polished stone or raku. 


Here are the basics for those of you that would rather read than watch a video. 


DIRECTIONS

  1. Grab one of those glass Christmas Ornaments from the local craft store or order them on Amazon. If you have Prime you'll get them pretty quick. 
  2. Put a few drops of Alcohol Ink inside of the ornament, swirling it around until you have full coverage
  3. Start adding gold or other metallic ink alternating it with the traditional ink
  4. Put glitter inside of the ball. (1 - 2 Tablespoons) and shake it around 
  5. Let it sit for a few minutes. The ink starts to dry quickly
  6. Add another layer of ink. It will run through the glitter and fill the negative space
  7. Add glitter (step 3) again
  8. Add ink
  9. Mix equal parts Mod Podge and water, pour a few tablespoons into the ball
  10. Add a little bit of paint. Shake it all up
  11. Let the paint drain out for five to ten minutes (this is when I clean my space)
  12. Clean outside with rubbing alcohol, leave upright to dry over night. 
If you want more detail, you can watch my short video on this process below. 


Thanks for stopping by and supporting my small business. 


Tuesday, November 3, 2020

Apple Pie Bulk Prep & Freeze

It's difficult for me to put a recipe online because with the exception of baked goods I don't measure when I cook. Although Apple Pie is technically a baked good, I'm not making my own crust so the process is expedited. In fact, if I have someone work the apple peeler for me, I can make 8 pies in an hour. That's right. 8 pies. 1 hour.

Who in the world needs 8 pies? You do. When you have a holiday potluck, take a pie. When your neighbor is recovering from surgery, take a pie. Your bestie's birthday, family supper or Bosses Day. You can never go wrong with Apple Pie.

You can drizzle it with caramel and make it decadent. Top it with French Vanilla ice cream for a class crowd pleasure or just heat up a slice and have it with your morning coffee. That's right. Pie for breakfast. It has fruit. 

I started the mass production of pies because each year we get a case of apples during picking season and they don't last forever. I make apple butter, apple sauce and apple pie and either freeze and can all of it so we have a good stash until the next apple picking season. 

The Method

I use store bought pie crusts from the freezer section at the grocery store for the bottom crust. I use the roll out crusts for the top crust. 

I wash my apples and put out all 8 bottom crusts. Then put sliced apples in the first shell, second shell, third and on and on until you have the first layer in all 8 pie shells. Mix the sugars together and grab a stick of butter from the freezer. Top with 1/4 cup of sugar mixture, sprinkle with apple pie spice and then use a cheese grater to dot the top with butter in all 8 shells. 

Layer, repeat. Layer , repeat until your pie is the right height. Then drop the roll out crust over the top and seal the edge. Sometimes it helps to brush a little water on the edges to help the edges seal.

Then I put the pies without any covering in the freezer until they are hard, (a few hours) and then in the evening I wrap them with plastic wrap and the a second time with foil. 

The cheese grater and frozen butter is the secret sauce y'all. It really speeds up the process. The set up and clean up are the hardest part of this method, but with set up, creation and clean up, the whole project takes less than 2 hours. 


Apple Pie Recipe (makes 8 pies)

Ingredients

30 Large Apples - Use a good pie apple. You want something firm. 
3 c. White Sugar
1 c. Brown Sugar
Apple Pie Spice for sprinkling
1 stick of frozen butter

8 Frozen Deep Dish Pie Shells (4 packs of 2)
8 Roll-Out Pie Crusts (4 packs of 2)

Instructions:

  1. Unwrap and put 8 pie crusts on an even surface (countertop or island works well)
  2. Put a layer of apple slices in each crust
  3. Sprinkle a 1/4 cup of the sugar mixture over the apple layer
  4. Sprinkle the layer with Apple Pie Spice
  5. Continue layering until Pie is desired height
  6. Top with roll-out crust, following directions on package for thawing, crimping edges to seal
  7. With a sharp knife, cut vents in the top of the pie
  8. Place on level surface in the freezer and leave uncovered until solid
  9. Once pies are solid they can be tightly wrapped with plastic wrap and the followed with a tightly wrapped layer of aluminum foil. 
Remember these pies are going to be frozen for a long time, and you want to avoid freezer burn so the one you cook on the 4th of July is just as delicious as the one you'll make the first time. 

Preparation:

  1. Pull frozen pie from freezer
  2. Remove wrap and place pie on cookie sheet
  3. Bake at 425 degrees with a piece of foil lightly over the top for 30 minutes. Remove foil and continue baking for 40-50 minutes until golden brown.

Monday, August 3, 2020

Free Cricut Chicken Coop Printables


One of the things I've been trying to keep in mind while I've been trapped in the house with my children during the pandemic season is this is time I'm going to wish for later. Not the anxiety and sickness part of it, or the confusion caused by the media bombardment, but the time I've had at home with the family. 
One of the things I keep asking myself is, when I look back on this time a year from now, what are the things that I will have wish I would have done?

On that list was get chickens. So that's what we did. Except... did you know there was a national chicken shortage in the spring? So we had to wait. But that gave me plenty of time to learn and study and plan for our backyard chickens. 

One of the things that I've seen over my travels online, are the coop signs that folks put in their yard or on their coops. I looked to see if there were any freebies on Cricut design space, but there weren't. So I made a few and thought I'd share. 

This would be great on a brightly colored piece of painted wood. 


This would be super cute on a piece of weathered wood or a a board with a chippy white painted finish. Download the Tiny Raptors Cricut Pattern here (SVG File)


Download the Fluffy Butt Free Cricut Pattern here (SVG File)

No, this one isn't for the Cricut. I made this one because the dog can only be around the girls if she's supervised because chickens are very exciting. So I made this, printed and put it in a page protector. It now dangles from a suction cup on the backdoor. Classy.


Saturday, July 18, 2020

Brown Sugar Bread & Butter Refrigerator Pickles

There are a handful of ingredients that I like to keep in the kitchen so it's easy to whip up something on the fly. There are the usual suspects, flour, sugar, milk, but beyond that there are a handful of other items that can always be found in our kitchen. Sun-dried tomatoes for example, last forever in the fridge and can be added to everything from scrambled eggs to calzone.


Bread and butter pickles is another staple that I like to keep around. I coarsely chop them and add them to macaroni or potato salad and as cucumbers come in from the garden, I chop them and just throw them back into the juice to pickle. I keep 2 jars going all the time. One that's ready and one that's pickling.


You can adjust the spices to your liking, and other veggies as they come in from the garden. Small banana peppers, onions or even carrots. When you get tired of pickling, don't throw out the juice. It's sweet-tart flavor is a wonderful addition to pasta salad, or mix with mayonnaise for a zesty, sweet slaw dressing. 

Want to make some of your own? You'll be glad you did.


Brown Sugar Bread & Butter Pickles

PREP THE CUCUMBERS:

2-3 thinly sliced cucumbers or enough fill a quart jar
(pickling cucumbers if you can find them, but any cucumber will do)

 1 c. Onion sliced thin

2 tablespoons kosher or other course salt

Sprinkle salt over sliced cucumbers and onions, cover and let them sweat for an hour or three. After their spa treatment, rinse cucumbers in a colander under cool water. 

If you want to skip this step you can. Your cucumbers may not be as crisp or as flavorful, but will still be delicious, so if you don't have time for the salt soak, just add a tablespoon of salt to your pickling brine.

------------------

ADD TO A SAUCEPAN: 

¾ c. White Vinegar
¾ c. Apple Cider Vinegar
½ c. Light Brown Sugar
½ c. Sugar
1½ teaspoon Mustard Seeds
½ teaspoon Celery Seeds
¼ teaspoon ground turmeric

DIRECTIONS:

Heat until sugar is dissolved, simmer, but don't boil. While your brine is warming, pack a quart size canning jar or any other glass container with your cucumbers and onions, stacking them to maximize space. Pour your hot brine over the top.

Cool on the counter for a couple of hours and then close up and put in the fridge. These will last for months in the refrigerator, but ours usually survive about a week. I do keep two jars going all the time. One is for eating and the other is for soaking. By the time the pickles in the back of the fridge are ready, the jar at the front is empty and ready to be refilled with fresh cucumbers, which I just add to the brine as they come in from the garden.

What are your unusual pantry staples?

Sunday, July 5, 2020

Are Masks the Magic Bullet to Stop Covid Spread? What does the data say?

Data. We are swimming in it. It's driven our decisions throughout this pandemic and yes, we know it's not perfect. We've heard that hospitals have been categorizing deaths as COVID-19 fatalities when the deceased passed away from other causes. We've heard that increased testing is catching the asymptomatic population as contact tracing improves, which can account for the rise in numbers. Despite these hiccups in the data it's our best chance at tracking and uncovering the methods that will get us back to reopening our economy and sending our children back to schools. 

Some states have mandated masks in areas where social distancing cannot be achieved and while this decision may not be embraced by everyone, we can lean on the data to see whether it is an effective precaution in protecting our vulnerable populations. 


Illinois is in stage 4 of opening. We can see that their numbers are beginning to rise again. I wonder if as numbers drop and populations begin to feel safer, that more folks are gathering together and taking more risks, which could increase the numbers. 


Massachusetts isn't showing a huge increase once the decline kicked in, other than that weird random spike on June 1st. It's more than likely a result of Memorial Day celebrations which took place the week before. 


We can see the Memorial Day spike in New Jersey too. This hot spot has done an astounding job flattening their curve.


Pennsylvania looks like they party on the weekends. :) 

We can look at some states that have implemented a mask mandate and numbers have not been affected as drastically as the ones shown above. We could speculate and argue the reasons all day long, but in the meantime, mask up people. Caring about others, should always been in style.

Wednesday, April 8, 2020

Covid-19 Cloth Mask Instructions


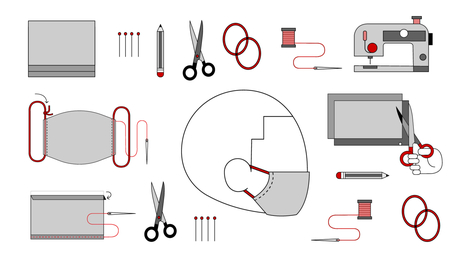
The CDC is recommending that everyone wear a cloth face covering when in public. Not everyone has access to a sewing machine, but you don't have to sew to create a face covering to protect you and others from germs.

If you ARE able to sew and have the time and have an extra stash of fabric, please consider making as many as you can and passing them on. Everyone needs one, but our essential workers need them more than everyone who is hunkered down at home. You can find a free printable note to put into the bag with the mask.

Here are some ideas to get masks into the hands of folks who need them.


  • CMS and Union County Schools have requested handmade cloth masks for cafeteria workers, who are still going into the schools to prepare lunches for children in need. 
  • Consider leaving masks (in ziptop bags) out for delivery workers who may be coming by your house. Print a copy of this sign, so they know they can take one.
  • When you make a grocery run hand them out (in ziptop bags) to grocery store workers
  • Ask your neighbors if they need them, offer one to postal workers or drop them in the mail to send to loved ones.
  • Reach out to Facebook group, called Face Masks for Healthcare Providers in North Carolina  to find other locations accepting drop off
  • Atrium and Novant Healthcare - Must be sewn: Drop off locations are HERE

MASK TUTORIAL ROUND UP


Thursday, March 19, 2020

Homemade Elderberry Syrup

It’s coming. Each time the kids sneeze or won’t get out of bed in the morning, my paranoia grows. And should they mention their stomach hurts or even better, the kid next to them in class threw up today, my stomach coils in reclusive fear. I would rather walk barefoot across Legos on a hardwood floor than get the stomach bug. It’s the thing I fear. Worse than spiders. Worse than assembling an entire household of IKEA furniture. *Shudders*


I believe in Elderberry. It works. And some say it’s the secret ingredient in Coca-Cola to boot. You can buy it from local health food stores, but it’s pricey. And they won’t be open when your little one starts running a fever at midnight. You can make your own pretty easy. If you are going to trapped in a house with ill children for the next few days you’ll have some time, right?


Make your own. I order the berries online and keep them in the freezer. They are shipped dry and can be left in the pantry, but our pantry is pretty small, so I take advantage of our big box freezer when I can. Then when the mood (or the first cold of the year whichever comes first) strikes me, I make a batch.


Here’s how.

Ingredients

2/3 cup dried black elderberries (if you are using fresh, use 1 ½ cups)

4 cups water

2 TBSP fresh or dried ginger root

1 tsp cinnamon powder

½ tsp Allspice or clove powder

½ tsp nutmeg

1 cup honey

Instructions

Add all ingredients EXCEPT HONEY to a medium saucepan and bring to a boil, stirring constantly. Reduce to a simmer for an hour or less or until the liquid has reduced by half. Remove from heat and mash berries with a potato masher or the back of a spoon. Allow to cool.

Add your honey to a jar or a bowl. I put my honey in the jar that I am going to store the syrup in, because I don’t like washing dishes. Strain and pour the warm Elderberry infusion on top on the honey. Put the top on your jar and shake. Once the honey is incorporated in the infusion, you have syrup! Store in the fridge. Lasts for up to three months. Long enough to get you through cold and flu season anyway.

To boost immunity take 1 tsp for kids and 1 Tablespoon for adults. To recover from sickness take the above dose every three hours until symptoms begin to subside.

Instant Pot option: Put all ingredients in pot, seal lid, and set manually for 9 minutes on high pressure. Vent pressure and strain.


Wednesday, March 18, 2020

Faux Stained Cement Floor

I had the brilliant idea to put laminate floors in the downstairs bathroom when we ripped out all the carpet and put in the new floors. That was a while ago, but it took about six months for the toilet to overflow and ruin the floors completely. I ripped them out, drank a glass of wine and stared the floor down for a good 20 minutes before I decided what to do with it. I couldn’t bear to tile it. I had spent way more time than I want to admit breaking up the tile in the bathroom and ended up having to have a friend’s Dad come and lend me his hammer and some expertise.

So, I went with plan C. I had some cement leveler & skim coat from another project. I figured regardless of what I did with the floor it was going to need to be level so I started there.

First, I removed the toilet. Then I stirred the leveler and spread it across the floor. The leveler was smooth and filled in all of my uneven areas with just a little help from the smooth end of a trowel… a 12-inch drywall knife would work here as well. Our house is built on a slab, so if yours is not, start by laying some cement backer board down. You can find an online tutorial but basically, it’s a cut and screw down sort of thing.


Once your leveler is down spread it around smooth, clean up your mess, wash your hands and carry on with your day. Once it’s dry - the fun part begins. I didn't like that my area wasn't as smooth as I wanted, so I ran an orbital sander over it a couple of times to make sure it was flush. The sander actually polished the cement and gave it dark and light areas from burnishing... and even a little shine.


If you don’t know by now, I’ll tell you. I have a lot of faith in clear glaze and acrylic paint. I’ve used it here, and then here again. I did spend some time looking at stained and colored cement floors online so I knew which direction I wanted to go.

I took a few plastic party cups and poured about a third of the cup full of glaze. I mixed about two tablespoons of brown and a few drops of black (dark brown) into one, a few drops of yellow, orange and brown (rust brown) to another and then more brown again, this time in more of a medium tone. I’ll tell ya’, I was nervous because I wasn’t sure if I could pull it off or not. Turns out, it wasn’t that hard in fact… a kid can do it. I know this because I wanted something random and I have a tendency to over think things… so I called the then, 8 year old in the room and had him dip a brush in the paints and dribble them on the floor. From there, I grabbed a large painters brush and some of the plain glaze and went to work. I dripped the uncolored glaze on the floor and took the brush and swirled it around.

The floor wasn’t perfectly level which worked out great. You can still see the grid-like pattern from the cement board that was removed, and it looked cool so I left it.

Once the floor was done and dried, I poured floor sealer over the top of it. You can purchase this type of sealer at the grocery store or you can over it from Amazon here.

Clean the floor as you would a regular tile floor and every year or two, add another coat of floor wax like this one to keep up the shine.

Sunday, March 1, 2020

DIY - Bathroom Cabinet Makeover

The cabinets in the boys’ bathroom have been “distressed” for some time now. When I say distressed, I don’t mean a lovely worn patina, I mean peeling polyurethane on cheap builder-grade cabinets. 

I wanted to change it up, but as always it needed to be done as a DIY since we don’t have new cabinets in the budget. I thought about chalk painting because I love being lazy managing my time when I’m working on a project and chalk paint requires no prep. But I wanted something that could mimic a driftwood effect, and wax on  chalk painted furniture can be a process to remove. So, proactively lazy I guess.


I started by removing the cabinet hardware, (knobs, not hinges). Then I partied on giving the cabinets a good scrub with 409 to remove any gunk and left it to dry. Meanwhile, I got my paint area set up, gathering the tools I would need to get the job done. This actually didn’t take very long, but it’s nice to get ready to paint and be able to just walk in and get started. 


Here’s my prep list:
Baby Wipes
Brush
Paint
Paint Key
Paper Towels
Ipad and charger

Ipad and charger might be a strange add to the list, but I enjoy listening to something while I have a project happening. During this project I listened to Little Fires Everywhere, which I thoroughly enjoyed.


I started by giving the cabinets a coat of Valspar Furniture Paint. It feels like enamel on the brush, is cleaned up with soap and water and doesn’t leave brush marks behind. Best yet… it can be tinted in whatever color you like. By the time the entire cabinet was painted the beginning was dry it was ready for a second coat. But I was done by that time, so I put my brush in a Ziplock bag, put aluminum foil over my paint cup and threw it all in the fridge. The next day, it was good to go.

So. I gave the cabinet another coat. 


When I have a project going, it’s hard for me to leave it alone. As soon as my second coat is done I’m ready to start the glaze, but it still needs some dry time. So I find something else to do. 

Generally, I spend that time reminding my kids about the amount of laundry in their rooms or video game usage. Then I tell them for the 10th time that there is wet paint in their bathroom and they shouldn’t touch it. They love it. 

The glaze is the fun part of the project. Here’s how you do it.

Mix a little black craft paint, I use this one with a clear glaze. I used Faux Glaze, you can pick it up from your hardware store or buy it here on Amazon. Don’t use a whole lot of glaze, a little goes a long way. Try half a cup of glaze with about a teaspoon of paint. I use a disposable cup or whatever I can find in the recycle bin. 

Start on an area that you can experiment on and have your baby wipes ready.

Lightly dip the brush in the paint and then lightly brush it on the edges of your area. If you want it to look like a grain across the area, they lightly drag it across left to right. If it’s too much paint, wipe it off with the wipes and then try again, but first… drag your brush across a paper towel to remove some of the excess. It’s always easier to add paint than to take it away. Play around with it until you get something you like. The best part about working with glaze is that if you don’t like the results, you can let it dry and just paint over it. 


Once you get the method down you’ll be painting and glazing everything in the house. Good luck! Send pictures! 

Don't Sweat, it's Just a Vignette

Different Heights and Levels

When you are building a vignette, you are trying to lead the eye through your display. Taller items pull the eye in, and shorter items draw and hold the view downward. Remember that they eye is drawn to bright colors as well, so keep that in mind when you are creating. Draw an imaginary line over the area you want to create and then arrange your items accordingly.

Use books, small pedestals or interesting boxes to add height to items that just aren’t high enough.


Odd numbers

It’s true in gardening, it’s true in art and it’s true here too. Odd always trumps even. Odd groupings or numbers of items add interest to your display. This is a rule that can be broken depending on the way the visual line falls, but generally holds true for most things. Keep it odd.


Throw some Light on it

Doesn’t do you any good to create a beautiful display if it’s hidden in darkness. If you want to draw attention to it, don’t hide it in the shadows. Decorators have always known this, making sure that lighting falls directly onto works on art or special features within a room. Put your best picks under a lamp or near a window. If you can’t afford to light specific areas that are great for displays, like bookshelves, make sure the back panel of the shelf is a lighter color, a semi-gloss paint or consider leaning mirrors against the back to reflect light into the shadowy areas.


Vary the depth

One of the mistakes that lots of folks make is to put their items all in a single line. Even if you are varying the heights of your objects, it’s not interesting if everything is all in a row. Push some of your items to the back, bring others to the front, remembering to vary your heights, colors and textures along the way.


Create a theme

It helps to create a theme when building displays. This doesn’t mean that if you are highlight a set of Harry Potter wands that you have to build an entire vignette dedicated to the book series, but you could throw the wands next to the books and a couple of other features that may look antique or mystical. Below the wands sit next to a carved mirror and a modern chess clock. While the chess clock may seem out of place, it’s not an ordinary household item which lends it some interest in the display.

Sometimes you can create a theme just by using muted colors or earth tones, or collections of items. Consider creating a display that tells a story. A set of weathered books, a crystal bowl on top and a pair of antique spectacles leaned against them all carry a sort of “intellectual” theme, making them similar although they are different things.


Find objects you love and you'll always love your results

The final rule, and yes, I’m calling it a rule is only buy objects you love or use objects that mean something to you. Whether it’s your Grandfather’s cigar box or just a bottle brush fox that you think is absolutely adorbs, don’t display it unless you love it. If you only display things that mean something and that you love to look at, it will all come together because you are the common denominator.


Stir it Up

Have fun and change it up. We have a friend that comments, that we always have “something new” every time she comes to the house. We actually don’t purchase new (or new to us) things very often, but I am easily bored and am frequently moving things around from one place to another. It looks like we have new stuff all the time, keeps our decor fresh and interesting and keeps me from being bored. Winner, winner, chicken dinner!

Goodbye Popcorn Ceiling - Beadboard Ceiling DIY


I have a confession. Our house had popcorn ceilings and we haven’t done anything about it yet. We are trying but seems like we only get around one to one ceiling a year. Last year we tackled our bathroom ceilings.


I know you don’t need a whole story about the project, but it was really quick and easy.  Essentially, I bought a thin bead board cut it to size and used the nail gun to attach it to the ceiling studs. I used a stud finder to find the studs and then put a piece of painter’s tape on the wall next to the ceiling stud to mark the area. My husband came and helped hold the ceiling in place while I tacked it around the left edge with the nail gun. I smoothed it to the center like I was pressing out the wrinkles in paper and then tacked it again with the nail gun. I finished it off by adding nails around the edges. I wasn’t worried about this because I knew I would be finishing the edge with a piece of screen porch molding.


Once everything was nailed into place I gave it a coat of soft white paint in satin. There is no window in this bathroom, so I wanted a little more light bounce. And there you have it. Popcorn ceilings gone. Mischief managed.

Faux Brick Wall DIY ~ Just Another Brick in the Wall


Like the look of those sleek New York City studios but love your house in the suburbs? Us too. Our décor could best be described as eclectic but it definitely leans toward farmhouse-bohemian fusion with a touch of junk collector. But. Who doesn’t like a brick wall?

You won’t believe how easy this was to create. And even better. It’s such an inexpensive update. This would be great for a teen, tween or kids room and would look great in a darling nursery. Take a look at how you can have one of your own in a day.

We bought brick paneling from our local hardware store and cut it to size so it would cover the wall. The paneling was less than $25 and we only needed four panels. This is one of the times we were glad not to have high ceilings because we had to take a few inches off of the bottom. I held the panel in place and the hubs tacked it into position with a couple of nails in the stud. We used a nail gun, which really helped make it easy, but you don’t have to have one. You can always screw the panels into place or go old school and use nails.  


Once the panels were in place, husband dropped the mic and left me to it. I’ll be honest, I tried several different methods before finally settling on the one that I should have started with. 

First, I thought I might just whitewash and wipe the panels down like I did when painted our fireplace mantel. The fireplace mantle is a lot smaller than a wall and it didn’t give me the texture that I was looking for. Then I thought maybe I would try to paint individual bricks with a less watered down paint but that did do it either. Once I opened up the tub of joint compound and got started, I realized I shouldn’t have tried to shortcut in the first place. 

I scooped out some of the joint compound with a regular-sized scraper and then applied it to the large sheet rock knife. Then, I drug it across the very top left corner of the wall, left to right. From there a did a couple of scrapes down over the area I had just spread left to right. Across-down-down. Across-down-down. And I kept that rhythm over probably a quarter of the wall stepping back frequently to admire and bite my nails. It looked great… but surely it couldn’t be THAT easy… Could it? It was. So easy, a kid could do it. 


Once I was done I went back over it, scraping and moving areas until I felt like the seams were hidden and the patterns were random enough that it looked like a weathered wall. Then I turned a fan on it, cleaned up my mess, washed my hands and went to bed. 

It dried fast. It was completely dry the next morning, but it was a thick spread and I was nervous about it being dry and I hadn’t done any laundry for an entire day so I put off the sealing until later in the afternoon.

My original intention was to buy some sort of sealer and roll it on, but instead I found a couple of cans of polyacrylic in the garage, put on a mask and lightly sprayed the wall. I had plastic drop cloth down on the floor and was super glad I did because it did leave a fine mist about a foot away from the wall. When I sprayed it I didn’t soak it down I just gave it a light coat and kept the back door and front door open to air out the house. In truth, the poly acrylic really doesn’t smell that bad. If you have a sensitivity to sprays, use a liquid poly sealer and roll it on. It’ll be fine.


And there you have it. Here is one more thing you need to know. Every single person that comes in your house is going to touch the wall. And then they are going to tell you how cool it is. And maybe, you can send them this link and they can make one of their own.